Everyone carp angler should know how to set up a method feeder rig with no excuse.
There is no denying that using a method feeder rig is one of the best ways to catch carp at commercial fisheries no matter what time of year it is.
Setting up a method feeder is actually extremely easy and could set you up for some exciting sessions on the bank and I’m sure you’ll have no issue setting up your rig in minutes after reading this post.
Using a method feeder is a way of presenting your hook bait naturally, mixed in with a ball of feed.
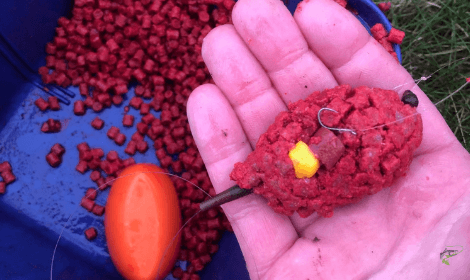
The hook bait is mixed in with your carp feed inside your mould creating a tangle-free zone.
When the ball of bait starts to break down your hook bait is surrounded by the rest of the loose bait that will aid in attracting (hopefully) shoals of hungry carp.
Setting up the rig
Before you start setting up your rig you’re going to have to make sure you have all the necessary parts (which to be fair isn’t a lot at all), so what is it I need I hear you ask?
To start, of course, you are going to need a method feeder. Most fisheries have rules stating you must use an in-line method feeder and for good reason.
As the name suggests an inline method feeder will run freely on your main line, so if disaster strikes and you snap off on a hard-fighting fish the method feeder will slide off the line, so the fish isn’t left dragging around a heavy method feeder, no one wants that.
Weight of feeder
Method feeders come in varying weights and which weight you choose will depend on a few factors the first being how far you are planning to cast.
As you can imagine the heavier a feeder, you use the further you will be able to cast (with a decent rod and reel).
The second is what features you plan on fishing; for example, if you plan to cast your feeder onto a slope off an island, then lighter feeders are not the way to go.
Using a heavier feeder will ensure your feeder stays planted on the slope and doesn’t roll away taking your hook bait with it.
As a general rule, I usually opt for a 30g or 40g feeder. This feeder seems perfect for accurate casting on reasonably sized waters and has enough weight to keep it planted on the water bed.
If you don’t already have a mould make sure you buy a feeder that comes with a mould that fits the feeder properly so your feeder is evenly covered. A great example that I use myself often, with great results, is the Korum in line method feeder which you can see below.
The mould comes with a push release on the back that ensure your bait ball can be released easily without breaking up at all.

Now that you’ve got your feeder and a nice new mould there are two ways you can go about completing the rest of your rig.
The extremely easy way and the easy way (yep setting up a method feeder rig really is that easy).
The Extremely Easy Way
This is the way I’d recommend to any beginner and even experienced anglers. It saves you time tying unnecessary knots and keeps the accessories needed to a minimum.
The only extra thing you are going to need is a quick change bead.
I’d recommend buying a few though as they are very easy to lose; trust me on this one I’ve lost plenty.
Now what you want to do is feed your main line through the centre of your feeder with the flimsy tube-like section at the top as shown in the picture below.

Once your main line is through the feeder, you are ready to tie on your quick change bead.
Separate the two sections and feed the top section onto your main line under your method feeder.

Now what you want to do is take the bottom section and thread it through the small hole and tie the bottom section onto your main line using an “improved clinch knot”

Now your method feeder rig is ready for the finishing touches of a hook length, which is also extremely easy to attach using this method, but I’ll get into that further through the post.
If you are using this method jump to the section on hook lengths.
The Easy Way
Now for the other method that will take a few extra items. For this, you’ll need a bead and a swivel.
You’ll want to start by sliding your method feeder onto your line followed by a standard bead instead of a quick change.
Then you’ll want to tie a swivel to the end with an improved clinch knot as explained below.
Now its time for a hook length so keep reading to find out how you can finish off your method feeder rig.
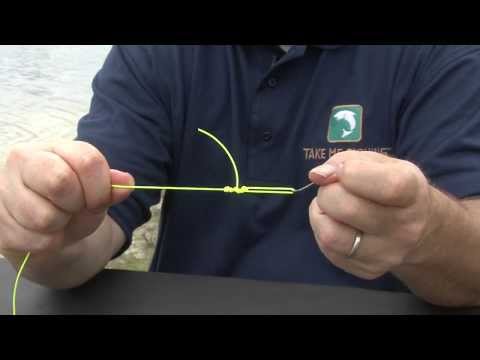
Tying an Improved Clinch Knot
If you’re unsure how to tie a clinch knot, you can watch the video below. It’s rather simple and provides a strong knot for attaching lines to hooks, swivels or your quick change bead for your method feeder rig.
Make sure and wet the knot before you pull it tight to provide lubrication, so the knot tightens properly.
Hook Lengths
When fishing the method feeder, the hook length will greatly impact your catch rate.
When fishing the method feeder, you’ll want to keep your hook length short; for me this is usually 4 inches.
Keeping the hook length short ensures your hook stays mixed in with your ball of bait as it breaks down and cant drift away.
Generally, I’ll always opt for pre-tied hair rigs which makes life a lot easier.
All you need to do is pull it out of the packet and attach it to your rig with no knots and frustration.

After you have hooked the loop on the pre-tied hair rig over the notch simply pull the top of the bead down over the bottom half tightly and that’s you ready to go.
To ensure your hook length won’t snap from aggressive bites opt for a hook length with higher breaking strain than your mainline.
Hook lengths will be weaker as they are so short, but by stepping up the breaking strain, you will at least reduce the chances of breaking off.
What type of hook length you use is generally up to you and your personal preference.
For example, you could opt for a banded hair rig if this is what you prefer.
Hook Baits
What hook baits to use with a method feeder is extremely broad. If you are opting for a hair rig on your rig (which you definitely should) near enough all conventional carp fishing baits can be used;
As you can see the options are very broad and some will work better from day to day. You just won’t know until you try them.
Lets take a closer look at some of the most popular hookbaits for method feeder fishing.
Boilies
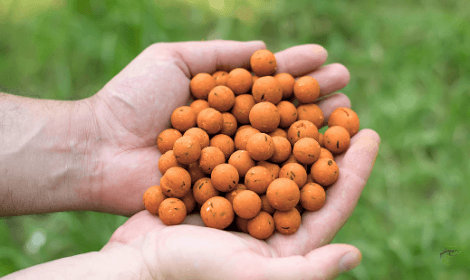
Boilies are one of the most carp fishing baits, and they pair extremely well with method feeder rigs.
Boilies are basically boiled balls of carp attracting ingredients like fish meal, that are then boiled to give them a hard outer shell, hence the name boilies.
Their high amino acid contents help stimulate carp feeding, and their high protein contents make them irresistible to hard-feeding carp.
They come in various colours and flavours to suit all seasons and venues.
Boilies range from sizes of 8mm up to around 25mm.
Just because you want to catch large fish does not mean you should opt for the largest boilie.
It is important to balance your rig.
It’s good practice to match a 10 or 12mm boilie to a size 10 hook and if you are bringing out the large 18 or 22mm boilies then a size 6 will do just fine.
Sweetcorn
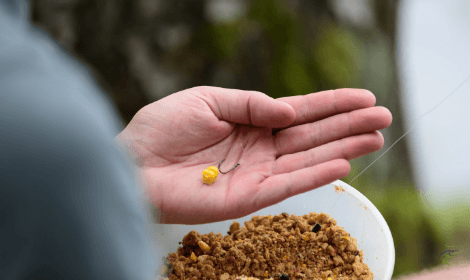
Sweetcorn is another great bait to use with a method feeder and nearly every other carp fishing method.
Not only do carp love sweetcorn but it’s extremely cheap and convenient for you to buy.
You’re probably wondering why sweetcorn is so good, right? Its bright yellow colour and high sugar and salt content in tinned sweetcorn are great for attracting surrounding fish.
Its natural high content of amino acids is also proven to be highly attractive to surrounding carp.
Pellets
Pellets are another bait to consider when selecting the best hook bait for method feeder rigs.
Pellets are sometimes considered to be similar to boilies due to the use of a lot of the same carp-attracting ingredients.
The main difference between boilies and pellets is how they break down in the water.
Boilies stay hard for long periods of time where pellets become soft and mushy over time which can make them a little tricky to keep on the hook for long periods of time.
However, pellets work great in the summer months due to their high oil content, and quite often you won’t need them to stay whole in the water for too long before catching fish.
Pellets come in a massive variety of flavours and colours just like boilies that can be matched to any carp fishing scenario or venue.
Hooking Bait on Hair Rigs
Hooking a bait on a hair rig is pretty easy, but you’ll need to get yourself a bait needle and if you are planning to buy boilies or pellets that are not pre-drilled you will need a bait drill. This is a good kit that is use myself.
If you are looking for some more information on the best baits for carp have a read of my other post.
To attach any of these baits, you’ll want to put the stopper on the hair rig over the end of your bait needle and then push the stopper and needle through the hole on your boilie, pellet or pop up or for soft baits like sweetcorn and peperami you can just push a hole through the bait.
Once you’ve pushed through pull the plastic stopper off the bait needle and make sure its horizontal at the end of the bait, so it doesn’t slide back through the hole.


Mixing Micro Pellets
When you’re fishing for carp with the method feeder micro pellets are single-handedly the best bait of choice for your feed mix.
No matter the time of year carp just can’t seem to avoid them. I usually opt for 4mm pellet but 2mm would work just fine as well.
The colour of micro pellets you use can affect how much you catch on a session.
If the water is clear in the colder months, I’d advise opting for bright colours like a tempting neon orange to give the lethargic carp something to home in on.
In the warmer months opt for darker colours like red which creates a good outline in the murkier water to tempt the carp.
When mixing your feed, it is essential you get it just right to have the best chance of catching the tricky carp.
Too wet and it won’t break down easily and present your hook bait.
Too dry and the feed mix will break down as soon as the feeder hits the water and won’t make it to the bottom of the water before it starts to break down.
Getting your mix just right will be easy if you follow the steps I’ve provided below.
The first thing I do when I arrive at the water is start to mix my micro pellet’s.
This gives them time to fully prepare when setting up the rest of the tackle so you can jump right into fishing as soon as you finish.
Fill a bait box with the amount of micro pellets you think you will use in your session (for me usually over half full but I have used a small amount in the pictures) then cover the pellets with water from the lake or pond and put the lid back on (make sure it’s tight).


Then turn the bait box upside down and shake out all the water through the small holes in the top. Keep shaking until no or very little water drips out.
Place the bait box with your half-mixed pellet upside down and continue setting up the rest of your tackle.
It will usually take between 15-20 minutes for your pellets to fully prepare, but you can check them when you’re ready.
Do this by squeezing a small ball of your mix together in your hands and dropping it in the margin. Watch how it breaks up. If it doesn’t break up after a few minutes it’s too wet.
Try waiting for them to dry out or add a sprinkle of ground bait to dry up the mixture and try again.
If the mix breaks up instantly when it hits the water, they’re too dry. Add some more water and shake it out through the holes in the top and wait another 5-10 minutes and test again.
That’s All!
For beginners setting up this rig can be a daunting experience if you have no idea what you are doing.
I’m sure you can now see how to set up a method feeder rig and how easy it is.
If you set up your method feeder like this, I’m sure you will be into some nice fish soon enough.
Make sure you follow the steps closely and after a few sessions you will get the hang of it.
If you are looking for some tips on how you can cast your method feeder rig accurately then take a read at my post.
Make sure and have some extra method feeder rig components on hand though as snapping off can be quite likely on snaggy venues.
I have also written some in-depth reviews about some great feeder rods for beginner and experienced anglers a like which you can check out below;
If you are looking for more information on feeder fishing have a read at my “what is feeder fishing” post. If you have any questions or anything you would like to add leave a comment below.
Make sure and let me know how you get on!