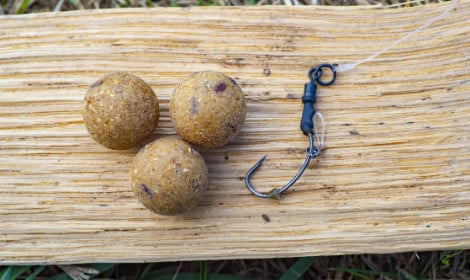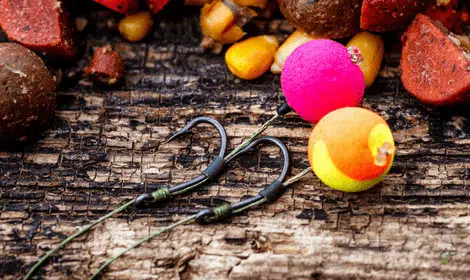
Boilies are one of the most versatile and common baits used by carp anglers for pre-baiting and are rigged as hook baits for many different rigs.
Boilies are boiled balls of carp attracting ingredients such as fishmeals, protein sources, bird foods, semolina, colours, flavouring and binding agents.
Due to their high nutritional value and attractive colours and flavours, carp find them very hard to resist once they are used to feeding on them.
For beginner anglers looking to give boilies a go as a hook bait for carp, they may fall at the first hurdle.
Unfortunately, it’s not just as easy as threading a boilie directly onto a hook, and there are specialised methods such as hair rigging to attach boilies to your rig.
These methods provide the best presentation possible and dramatically increase the chances of carp picking up your boilie.
In this post, I will focus on how to put boilies on a hook.
How to Put Boilies on a Hook?
As I touched on briefly, when fishing with boilies for carp, it is extremely uncommon to pierce them directly onto the hook.
This usually results in them breaking up due to their hard consistency and renders them useless for catching fish.
If you successfully get the boilie onto the hook, it will conceal most of the hook and a lot of the point.
If a carp was to pick up your bait, the hook point would most likely be concealed, resulting in plenty of lost fish as it will not penetrate the carp’s mouth.
Why are Boiles Attached to Hair Rigs?
The best way to hook boilies onto a rig is by using a hair rig.
Hair rigs were first invented and trialled in the 1980s by Kevin Maddocks and Len Middleton, two of the largest names in carp fishing at the time.
Since then, this method has revolutionized the carp fishing game, and hair rigs are commonplace in carp anglers’ tackle boxes across the globe.
So what exactly are hair rigs? Hair rigs refer to the method of attaching the bait to the hook without having to pierce the hook directly into the bait of choice.
As you all know, carp may seem smarter than you’d initially thought and can shy away from baits that don’t quite sit right in the water.
Carp also suck baits into their mouth to taste before they fully consume them so if they taste something strange like a hook they will immediately spit out the bait, which results in another missed bite.
So basically, this is why hair rigs were invented. Kevin and Len realised this was a major issue and spent many hours testing a rig using a real piece of human hair to attach the bait inside test tanks with captive carp.
This is where the name hair rig originated from. As you can expect, hair rigs using real hair when not exactly the strongest, but they worked excellently by allowing the bait to act naturally while attached a short distance from the hook.
When the carp suck the bait into their mouth when a hair rig is used, they, more often than not, will consume the full bait, pulling the hook into their mouth a short distance behind the bait.
As the carp moves away, your feeder or attached lead will set the hook, and the carp will run in alarm, which further sets the hook.
Due to this, hair rigs are classed as self-setting rigs; usually, the angler will not need to set the hook.
With the development of modern materials and strong braid, the real human hair was swapped out years ago, but the hair rig name still stands.
Steps for Attaching Boilies to Hair Rigs

The video above provides great guidance on the easiest way to attach boilies to a pre-tied carp fishing rig that is more than good enough to put fish in the net.
The following steps are exactly how you should put a boilie onto a hair rig:
- Pierce, throw the middle of the boilie with your baiting needle.
- Hook the top of your pretied hair rig with the end of the needle
- Pull the needle and slide the boilie over the end of the needle onto the hair rig.
- Once the loop emerges from the other side, unhook the baiting needle
- Pass the bait stop through the loop
- Slide the boilie down onto the bait stop tightly
- Job done, it really is that easy
What Size of Boilies Should you Use?
When pairing a boilie to your, you should think about what size of boilie and hook you’re going to use.
The rig needs to be fairly balanced to give you the best chance of getting fish in the net.
If the boilie is too large and interferes with the movements of the hook, the chances of hooking into a fish as it investigates your bait are drastically reduced.
The hook needs to be able to spin and move freely to give you the best chance of piercing the fish as it picks up your rig.
Also, carp are fairly wary and inquisitive and will investigate a lot of potential food on the bottom.
They will even suck baits into their mouths to see how naturally it behaves underwater. If your boilie is too large or too small for the hook you are using the bait will react unnaturally and can turn the carp away.As a general rule of thumb, you can follow the following guidance from carpology:
You’ll see that 14-15mm sized baits will match a size 6 or 8 hook well. Larger 20mm boilies may require a size 4 or 6 hook and a single grain of plastic corn will match and balance a size 8-10 hook.
That’s All
You should now know exactly how to put a boilie on a hook. The process is fairly simple and can help you get some fish in the net.
If you have any questions, don’t hesitate to leave a reply below, and I’ll get back to you ASAP.


