
It is incredibly well-known in the coarse and carp fishing world that fishing the method feeder with micro pellets can be one of the most productive methods throughout the year.
By mastering the method feeder, you can near guarantee catches on every session, but one factor you’re going to need to perfect is mixing micro pellets to mould around your method feeder.
If your pellets are too soft and mushy, they will stick to the feeder and not break up for the carp to feed on, and if they are too dry, they can break away during the cast or as the feeder sinks to the bottom.
Is the process hard? Not at all!
But you will need to learn the steps to make the perfect pellets every time.
Luckily for you, in the post, I am going to show you how to prepare pellets for a method feeder the easy way.
Choosing the Right Pellets
Before you need to worry about preparing your pellets, you will need to make sure you purchase the correct pellets to give yourself the best chance of catching any carp.
Carp pellets come in a range of sizes from micro pellets from 2mm to 4mm, and then regular pellets are usually used as hook baits or loose feed at 6mm up to around 20mm when fishing for huge fish.
When choosing pellets to mould around your method feeder rig, you want to be opting for the micro pellets. I usually opt for 4mm pellets, but 2mm will work just fine.
When selecting a bag of pellets, keep in mind that the colour can significantly impact catch rates, and this will vary with what season you are fishing.
During the winter, in colder months, bright colour like neon orange is most effective at attracting the more lethargic carp.
In warmer summer months, darker colours are best to create a distinct outline in murky waters.
Also, make sure you buy a large bag of at least 1kg if you plan on fishing a long session. You will be stunned how quickly they disappear when casting often.
Preparing the Micro Pellets
Now that you are all stocked up on the correct pellets, the mixing method is not difficult at all.
But as I said before, you must follow these steps closely to ensure they are near perfect for giving you the best chance of catching more or any carp at all.
When preparing micro pellets, they will need to be left to soak for a while, so the first thing I do when I arrive at the fishing venue is look out your micro pellets and start the preparation.

For this, you’ll need a large bait box with small holes on the lid.
The first thing you want to do is fill your bait box. I usually only fill the tub around half full to get the day started but feel free to mix up any amount you want.
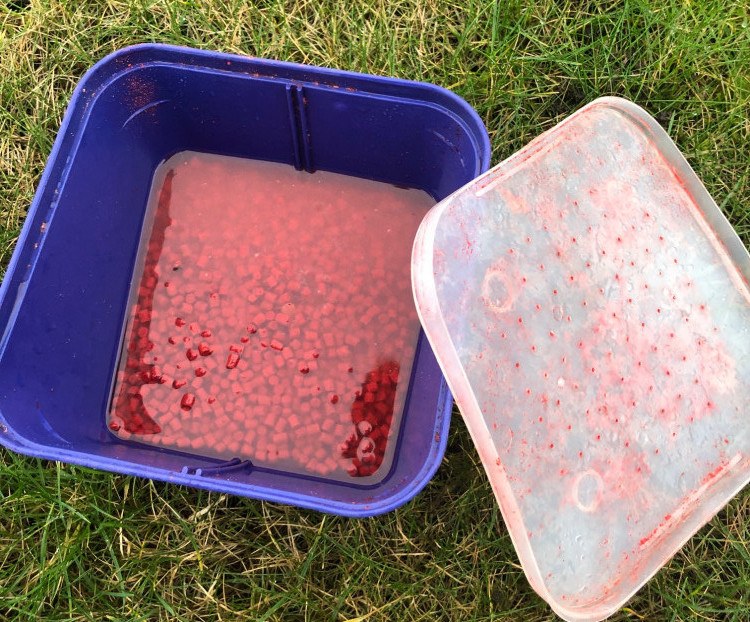
The next thing you want to do is cover the pellets with lake water up to around 10mm above the top of the bait. Put the lid back on tightly and wait for approximately 2 minutes if you are using 2mm pellets or 4 minutes if you are using 4mm pellets.
Now turn the bait box upside down and shake out all the excess water through the small holes on the lid.
Keep shaking until no or very few drops come out, and place the bait box back down on the ground upside down.
You can set up the rest of the tackle when you wait for the micro pellets to be fully prepared. This usually takes around 15-20 so when you are ready to start fishing, your pellets should be too.
Testing the Micro Pellets
More often than not, your pellets will be ready after these simple steps, but it’s best to test them before you start fishing.
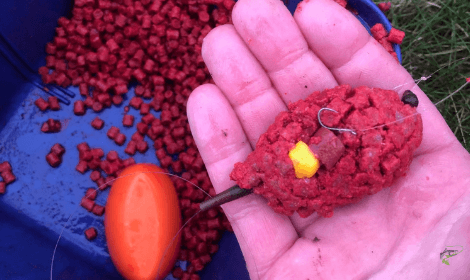
You can easily do this by picking up a small bait ball by moulding a batch around your feeder, and dropping it into the margin where you can watch what happens.
If the pellets start to break away extremely quickly or when the feeder hits the water, then your pellets are too dry and you’ll need to add some water and let them soak for a while longer.
Add some water, leave it for a minute or two, then shake the excess water through the holes and wait for another 5-10 minutes before testing again.
If you drop the feeder into the water and the pellets don’t break away after a few minutes, your mixture is too wet.
Thankfully you can solve this pretty quickly as well by adding in a sprinkle of groundbait. Make sure and add little bits at a time so you don’t make the mixture too dry.
Once the moulded pellets reach the bottom, stuck to the feeder, and start to break away after a minute or two of resting on the bottom, your mixture is perfect, and you are ready to start fishing!
It’s that Simple!
I’m sure you can now see that preparing micro pellets for a method feeder is extremely simple if you follow these steps.
As long as you have the correct pellets and test your pellet mixture before you start fishing, your chances of catching should be significantly increased.
If you are still unsure how to set up a method feeder rig, then this post will get you set up in no time.
Please feel free to let me know how you get on with this method for mixing pellets, and feel free to ask any questions in the comments below.

I am new to this type of fishing , just need to know are their any micro pellets to use ie manufacturer ,
Hi Ross,
All the big carp fishing brands all hove their take on micro pellets, if not multiple. To be honest, they will all do the job but I’d usually go for small 2mm pellets from Sonubaits or Dynamite robin reds.